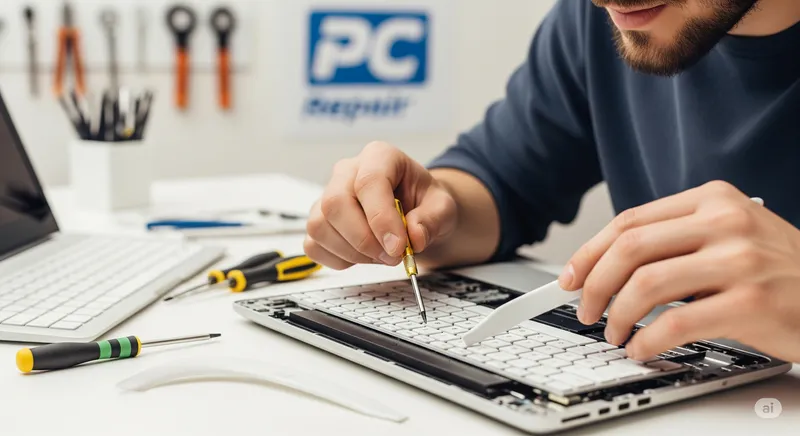
DIY Laptop Keyboard Replacement: A Step-by-Step Guide

A single spilled coffee or one too many crumbs can bring your laptop’s keyboard to a grinding halt. Suddenly, keys are sticky, non-responsive, or typing gibberish. While your first thought might be a costly professional repair, a DIY keyboard replacement is one of the more accessible laptop repairs for the determined tech enthusiast.
However, “accessible” doesn’t mean “easy.” Modern laptops are compact marvels of engineering, and what seems simple can quickly become complex. This guide will walk you through the general process, help you gather the right tools, and, most importantly, help you decide if this is a project you should tackle yourself or hand off to the professionals at our Oceanside and Encinitas shops.
Warning: Proceed With Caution!
Before you order a part, please read this. Attempting a DIY repair can:
- Void your manufacturer’s warranty.
- Lead to further damage if done incorrectly (e.g., tearing delicate ribbon cables, shorting the motherboard).
- Be significantly more difficult on certain models (especially modern ultrabooks and MacBooks).
This guide is for informational purposes only. Proceed at your own risk.
The DIY Toolkit
Having the right tools is non-negotiable. Using a butter knife as a pry tool is a recipe for a cracked plastic case.
- Replacement Keyboard: Make sure it’s the exact model for your laptop. Check the part number on the bottom of your machine.
- Precision Screwdriver Set: You’ll likely need a Phillips #00 or #000.
- Plastic Pry Tools (Spudgers): Essential for safely separating plastic clips without causing damage.
- Tweezers: For manipulating tiny ribbon cable latches and screws.
- A Well-Lit, Organized Workspace: Use small containers to keep track of screws. They are often different lengths!
The General Step-by-Step Process
Every laptop is different. Your first step should always be to find a video or guide (like on iFixit) for your specific laptop model. The steps below are a general overview.
- Safety First, Always: Power down the laptop completely. Unplug the AC adapter. If your laptop has a removable battery, take it out. If it’s internal, you’ll need to open the case and disconnect the battery from the motherboard as your very first step inside.
- Gaining Access: This is where models diverge wildly.
- Easy Method (Older/Business Laptops): Some keyboards are held in by a few clips or screws accessible from the top. You simply pop off a bezel above the keyboard, undo the screws, and lift it out. This is the ideal scenario.
- Hard Method (Most Modern Laptops): The keyboard is often integrated into the top case/palmrest and is only accessible from the inside. This means you have to remove the entire bottom case, disconnect the motherboard, hard drive, fans, and other components just to get to the back of the keyboard.
- Disconnecting the Ribbon Cable: The keyboard connects to the motherboard via a flat, fragile ribbon cable. This cable is held in place by a tiny plastic latch. You must carefully flip this latch up (it usually flips up like a tiny lever) before gently sliding the cable out. Never pull on the cable itself.
- Removing the Old Keyboard: If it’s the “Hard Method,” the keyboard might be secured by dozens of tiny screws or, worse, melted plastic rivets. If it’s riveted, the job becomes exponentially harder, requiring you to carefully cut the rivets and find a new way to secure the replacement.
- Installing the New Keyboard: Carefully place the new keyboard, re-secure it (with screws or your chosen method for rivets), and re-connect the ribbon cable. Make sure the cable is fully seated and straight before closing the latch.
- Reassembly and Testing: Reconnect the battery last. Before you screw the whole case back together, do a quick power-on test to see if the new keyboard works. Open a text document and test every single key.
When to Stop and Call the Pros
The DIY-to-Pro decision point is crucial. It’s time to call us if:
- Your laptop is a MacBook. Most modern MacBook keyboards are riveted and part of a multi-hundred-dollar “Top Case Assembly.” It’s not a simple swap.
- The keyboard is secured by dozens of plastic rivets.
- You have to remove the entire motherboard to access it.
- You feel unsure at any point, especially when dealing with ribbon cables. A torn cable or a damaged motherboard connector is a much more expensive fix.
| Factor | DIY Repair | Professional Repair (PC Repair Center) |
|---|---|---|
| Cost | Price of part ($20-$60) | Part Cost + Labor ($75-$150+) |
| Time | 1-4 hours (or more) | Typically same-day or next-day |
| Risk | High (potential for more damage) | Low (Guaranteed work with a 90-day warranty) |
| Tools | You must purchase them | We have everything needed |
Replacing a keyboard can be a rewarding project, but it can also be a frustrating one. If you’ve assessed the task and feel it’s beyond your comfort zone, that’s what we’re here for. Our technicians in Oceanside and Encinitas can perform this repair quickly, safely, and with a warranty, giving you peace of mind.